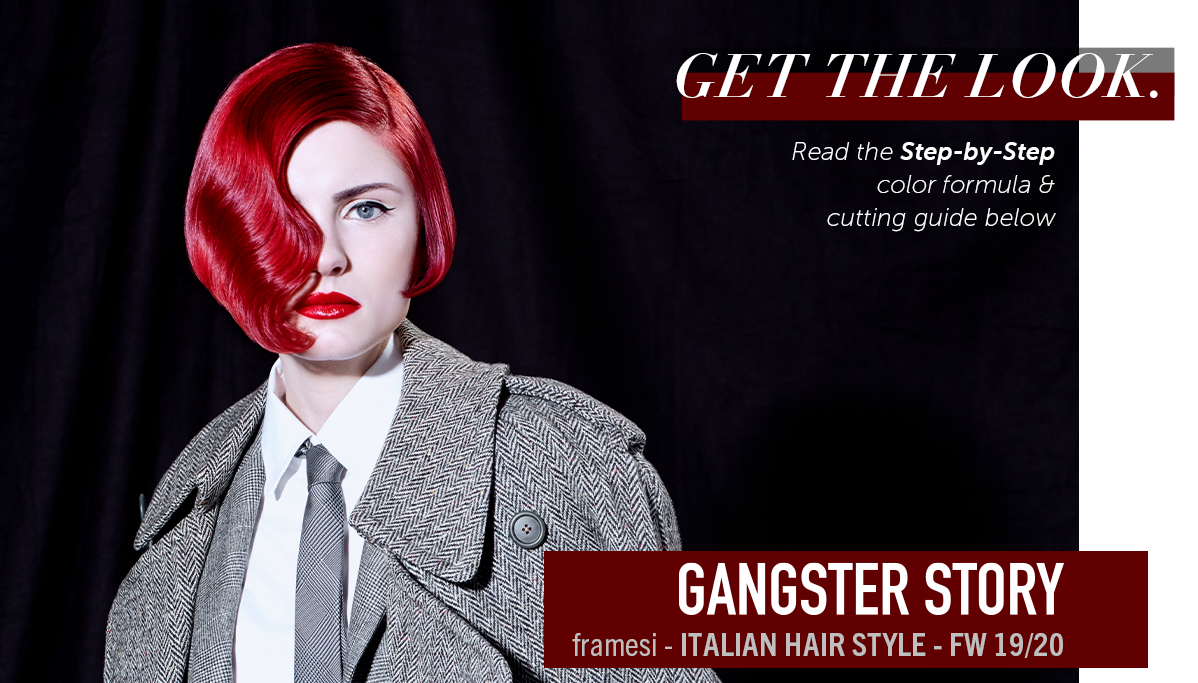
To understand this trend, we must remember many different gangster movies: from those Hollywood classic stories that used to take place in the Prohibition years, through the movies of the Seventies, to the video clips of the youth’s idols playing gangsta-rap music. On the runways, we have seen models in the Scorsese’s Bonnie & Clyde or Coppola’s Goodfellas look. The double-breasted suits with vest and tie clip are impeccable. Well-padded shoulders make the figure more impressive. The precious artisanal male tailoring is a must-have. The look, indeed, has always been a distinctive element: gangsters and godfathers used to dress up like successful businessmen to show off their respectability. However, on the catwalks, Gangster Story is also a very modern trend from the Twenties and Thirties and runs across the Seventies to reach today’s music bands of the gangsta-rap music movement. Surely much less elegant than gangsters, they also love to exhibit their richness and their media power. It is a coarse, sometimes crude richness that tells about actuality. These bad boys are not moralists, they do not care to look respectable, but – on the contrary – are proud of their negative image. They are the symbol of a changing time that today legitimizes also bad and controversial “heroes”.
Color Application Step-By-Step
Color Formulas:
- FORMULA A: Framcolor 2001 INTENSE 5.055 (30g/cc/1 oz ) + Framesi Professional Activator 20 Volume (60cc/g/2 oz)
- FORMULA B: Framcolor 2001 Light&Shine 7.55 (20 g/cc/ 2/3 oz) + Framcolor 2001 Light&Shine 6.56 (10 g/cc/1/3 oz) NO DEVELOPER NEEDED FOR FORMULA B
- FRAMCOLOR 2001 LIGHT&SHINE can be used as a direct dye when refreshing faded ends or toning.
1. Lift the entire hair up to level 8 (yellow/orange) with framesi DECOLOR B CREAM PLUS LIGHTENER.

2. Tone the root area with FORMULA A.

3. Tone the lengths with FORMULA B.

Discover Italian Style framesi Classes offer this Color Technique and more!
Italian Style Cutting Step-by-Step
A new twist to the standard long layered cut!
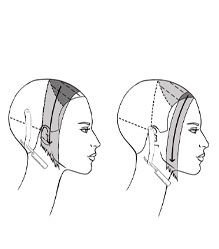
1. Isolate the hair according to the sectioning diagram and list below:
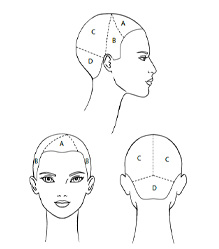
Sectioning:
- SECTION A – isolate a front section: trace a line from ¾ of the left eyebrow arch to 2 cm (¾“) left of the vertex. From this point, trace a curved line to the end of the right eyebrow arch.
- SECTIONS B – trace a line from the tip of the ear to tip of the ear passing through the vertex.
- SECTIONS C – trace a central line from the vertex to the occipital bone. From this point, trace two diagonal lines to mid ears.
- SECTION D – is the nape section 2. Starting with SECTION B – cut a guide to the clavicle (collarbone). Comb the hair to the front and point cut square with a stationary guide.
1. SECTION D – comb the entire hair toward the left hairline and cut diagonally from the corner of the nape to mid-ear; do the same on the right in order to obtain a central point. Now, cut the entire section scissors over comb, keeping the sides closer to the head and leaving length toward the center.
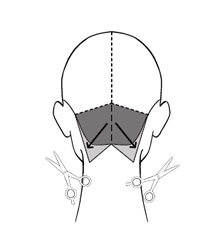
2. SECTIONS C – Using the razor and the Scratching Cut technique “Gentle motion with the razor to refine bulk”, making diagonal subsections, cut from 1 cm (½“) below the crown toward the earlobe, combing the hair inwards with moderate tension in order to obtain a light layering.

3. SECTIONS B – making diagonal subsections, comb the hair inwards and cut following the back diagonal lines using the razor and the Scratching Cut technique, utilizing the top of Section D as your guide.
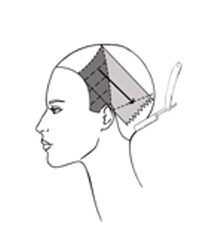
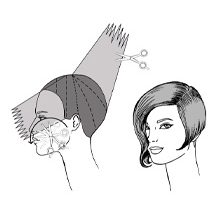
4. SECTION A – isolate a front half-moon shaped section 2 cm (¾“) thick, between the end of the left eyebrow and the beginning of the right eyebrow arch. Making diagonal subsections, as shown in the diagram, cut the remaining section from the found perimeter to 2 cm (¾“) below the chin using the razor and the Scratching Cut technique. Now, comb the half-moon shaped section and slide cut from the length of section A to 3-4 cm (1 – 1½“) below the chin.
5. Using the Dry Cutting technique and blending shears, soften the back: make radial partings and comb hair vertically, keep your fingers parallel to the head and cut to the length found in the crown area. In the same fashion, soften the front: make vertical partings, comb the hair outwards and only cut the bottom third part (lower midshaft toward the ends) of the subsections with blending shears, cutting with a round movement from inside to the ends.
Styling Step-By-Step:
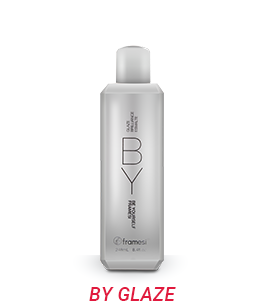
Step 1. Apply BY Glaze on the fringe, create a finger wave, pin it and blow-dry with a diffuser.
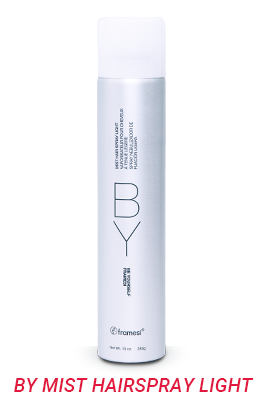
Step 2. Apply BY Mist Hair Spray Light on the remaining hair and blow-dry softly while flipping the ends toward the face.
Step 3. Refine the waves with a flat iron and then brush the hair to make the volume natural.
Take-Home Treatment:

